Did you know that you can navigate the posts by swiping left and right?
Making that Intro Roll
28 Jul 2019
. category:
tech
.
#intrologo
#introroll
#videologo
#davinci_resolve
So I decided to convert my logo into an intro roll for my youtube videos. I was dreading it beforehand with the preconception that it’s a long convoluted process. Turns out it isn’t. In fact, it was pretty fun to mess around with the whole thing. I decided to do this using DaVinci Resolve 15 for the following reasons:
- It's FREE!
- Some people in the industry use it, so it might be useful to learn in the long run.
- Lots of tutorials are avaiable online.
Speaking of tutorials, this one helped me out lots: https://www.youtube.com/watch?v=3qE3YUGeYjY&t=952s. The video starts from importing the static logo, animating the individual components of it, and finalizing the end product. There are some steps that are glazed over when he fixes the “bugs” but it took little time to figure it out. Adding audio was not part of the tutorial, so I had to figure that out too.
NOTE: Make sure to set the target FPS in the very beginning; otherwise, you’ll have to restart or do some awkward deleting and control+z-ing.
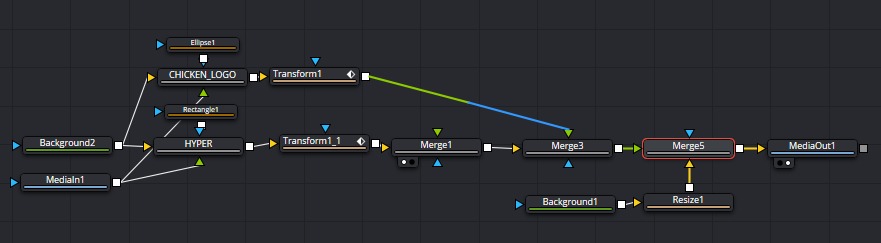
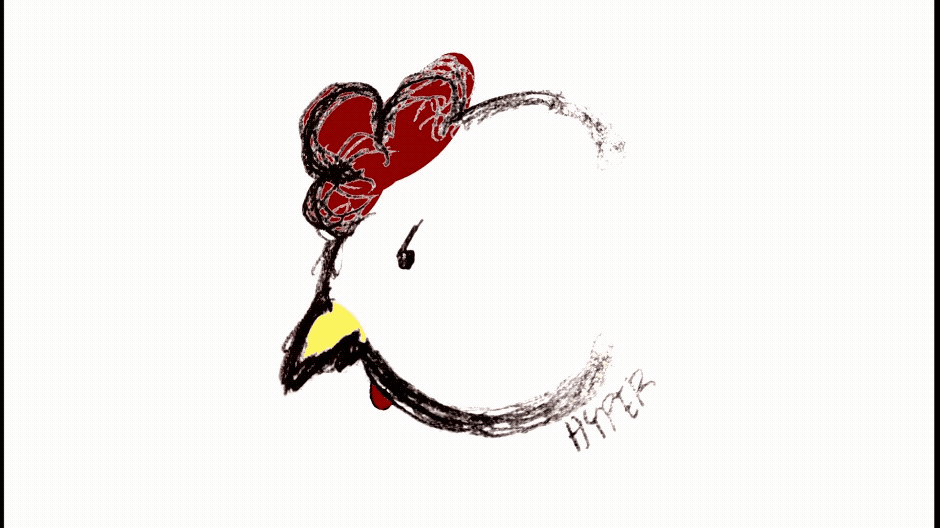
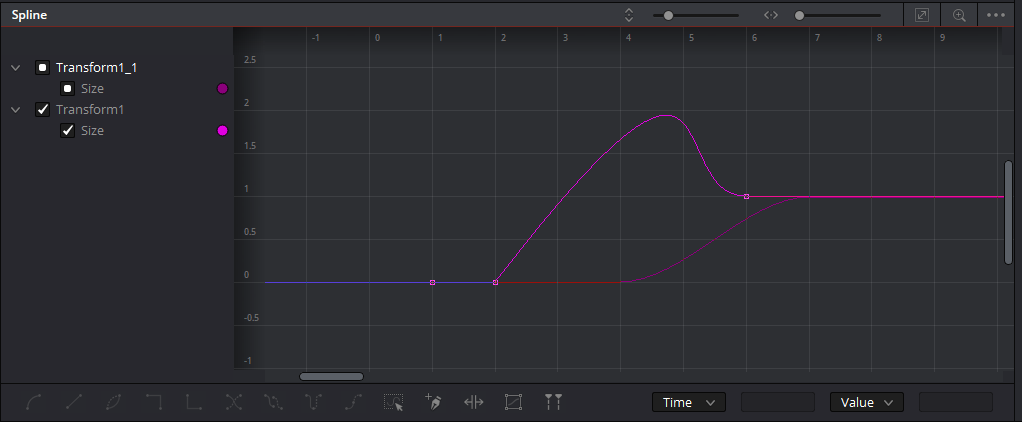
My process flow goes like this: animate the logo, add sound, integrate both in the same timeline, finalize the output video. The first step is to cut the individual components of the logo into their respective bins. This is done by merging MediaIn1 with the transparent (ALPHA == 0) background, Background2. A merge block should appear which I labeled as HYPER and CHICKEN_LOGO. I then added a rectangle and ellipse masks to each block respectively. Next, I added a transform for each block that zooms out then back in. This is done with the help of the spline tab. This can also be done by clicking on the timeline and adding changes to the size and whatnot manually.
NOTE: Clicking the points within the spline and pressing CTRL+F will smoothen the transitions of the animation.
After that’s done, it was time to add a chicken sound to my video. A quick google search revealed to me that DaVinci Resolve 15 has a built-in voiceover option! This can be found in the fairlight tab. By adding a track, changing the input to your microphone, and clicking the “R” box on the track, you’re all set to press the record button to immortalize your voice.
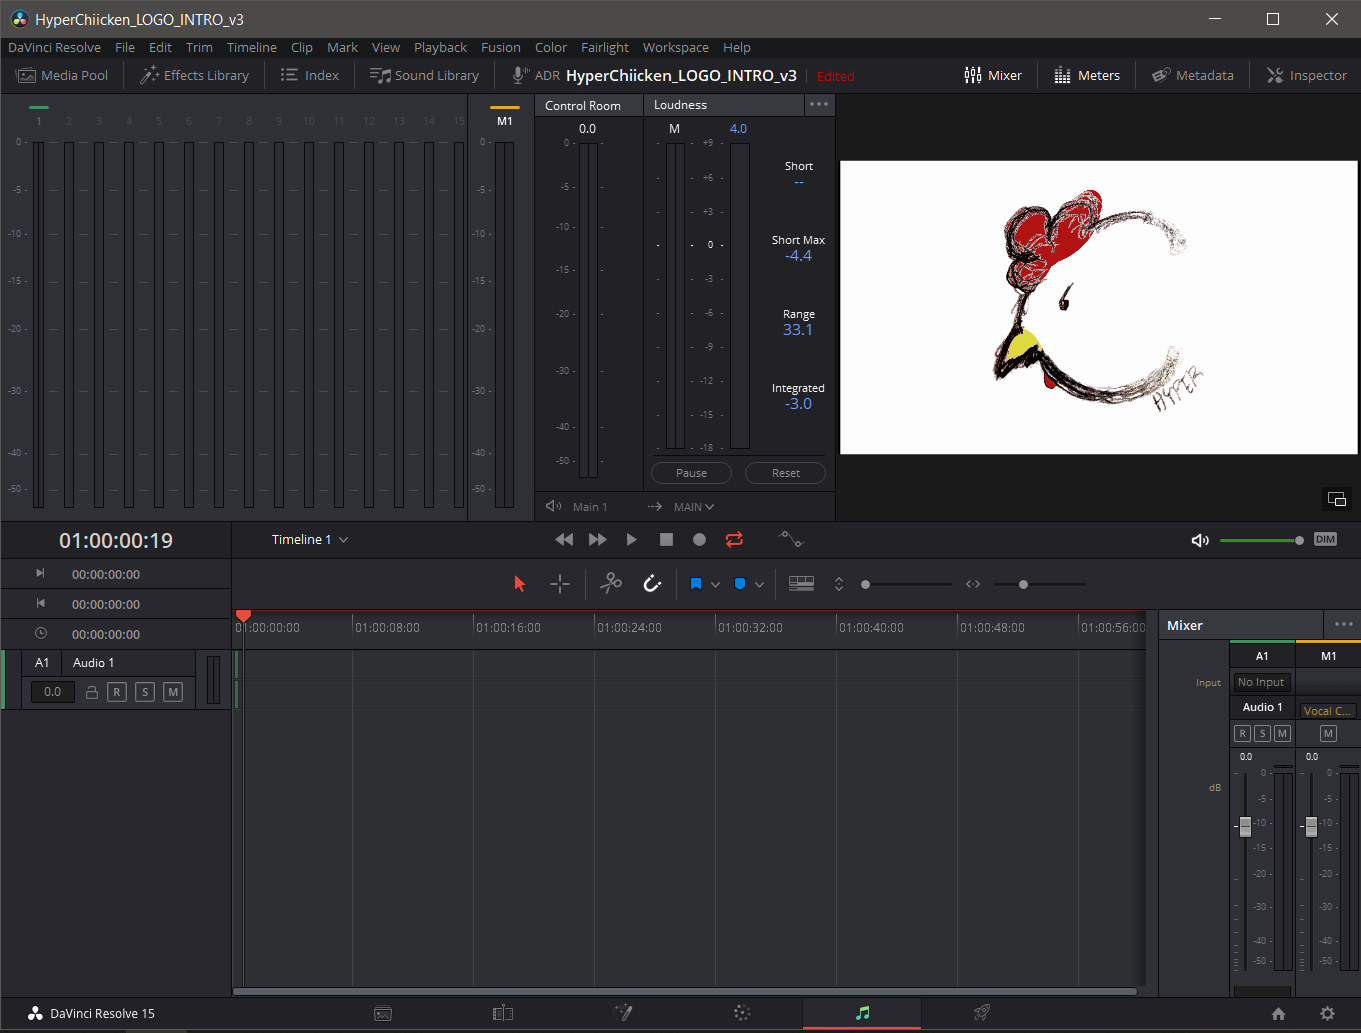
The audio recordings automatically go to your media pool. Now all I had to do was drag and drop my audio onto the timeline and adjust to where I want it to go. Voila! Intro Roll complete! Well, not really, I still had to render it by going to the Deliver tab. But yeah, it was pretty simple process that had a tad bit of a learning curve. Overall, it’s fun once you get how to cobble things together.